Easy Way to Make 360 VR Designs
Article posted on
2019-11-25
You will need only an equirectangular grid and any image editing software like Photoshop.
Since studying as an architect, and maybe even before, I liked sketching. Before any big project as building, branding or UI, I had to spend some time by drawing on a piece of paper. For me, it was kind of way of synchronizing what I had in my head with what I want to produce.
When I started playing with VR, this habit becomes handy. It’s not easy to predict how my idea will feel in 3d, so drawing sketches helped to imagine this space before building it.
Almost two years, I was exploring ways that could help to draw for VR. I came up with the idea to use the equirectangular grid. It helped to bring more or less realistic 360 designs. I got a lot of positive feedback from people that tried to use it.
This research helped me a lot. Some time ago, I had an exercise/personal project “Month of Rebounds.” Practically, every day, I was taking some existing idea from Dribbble and explored it more. For some shots, I was taking nice 2d designs and tried to figure out if VR can make them better. To make this in a short time, I used the same grid as for 360 sketches, but it this time in Photoshop. Quite often, people have reached me and asked how I did it, so I decided to make a short tutorial and describe my flow step by step. If you will catch concepts, it becomes pretty simple.
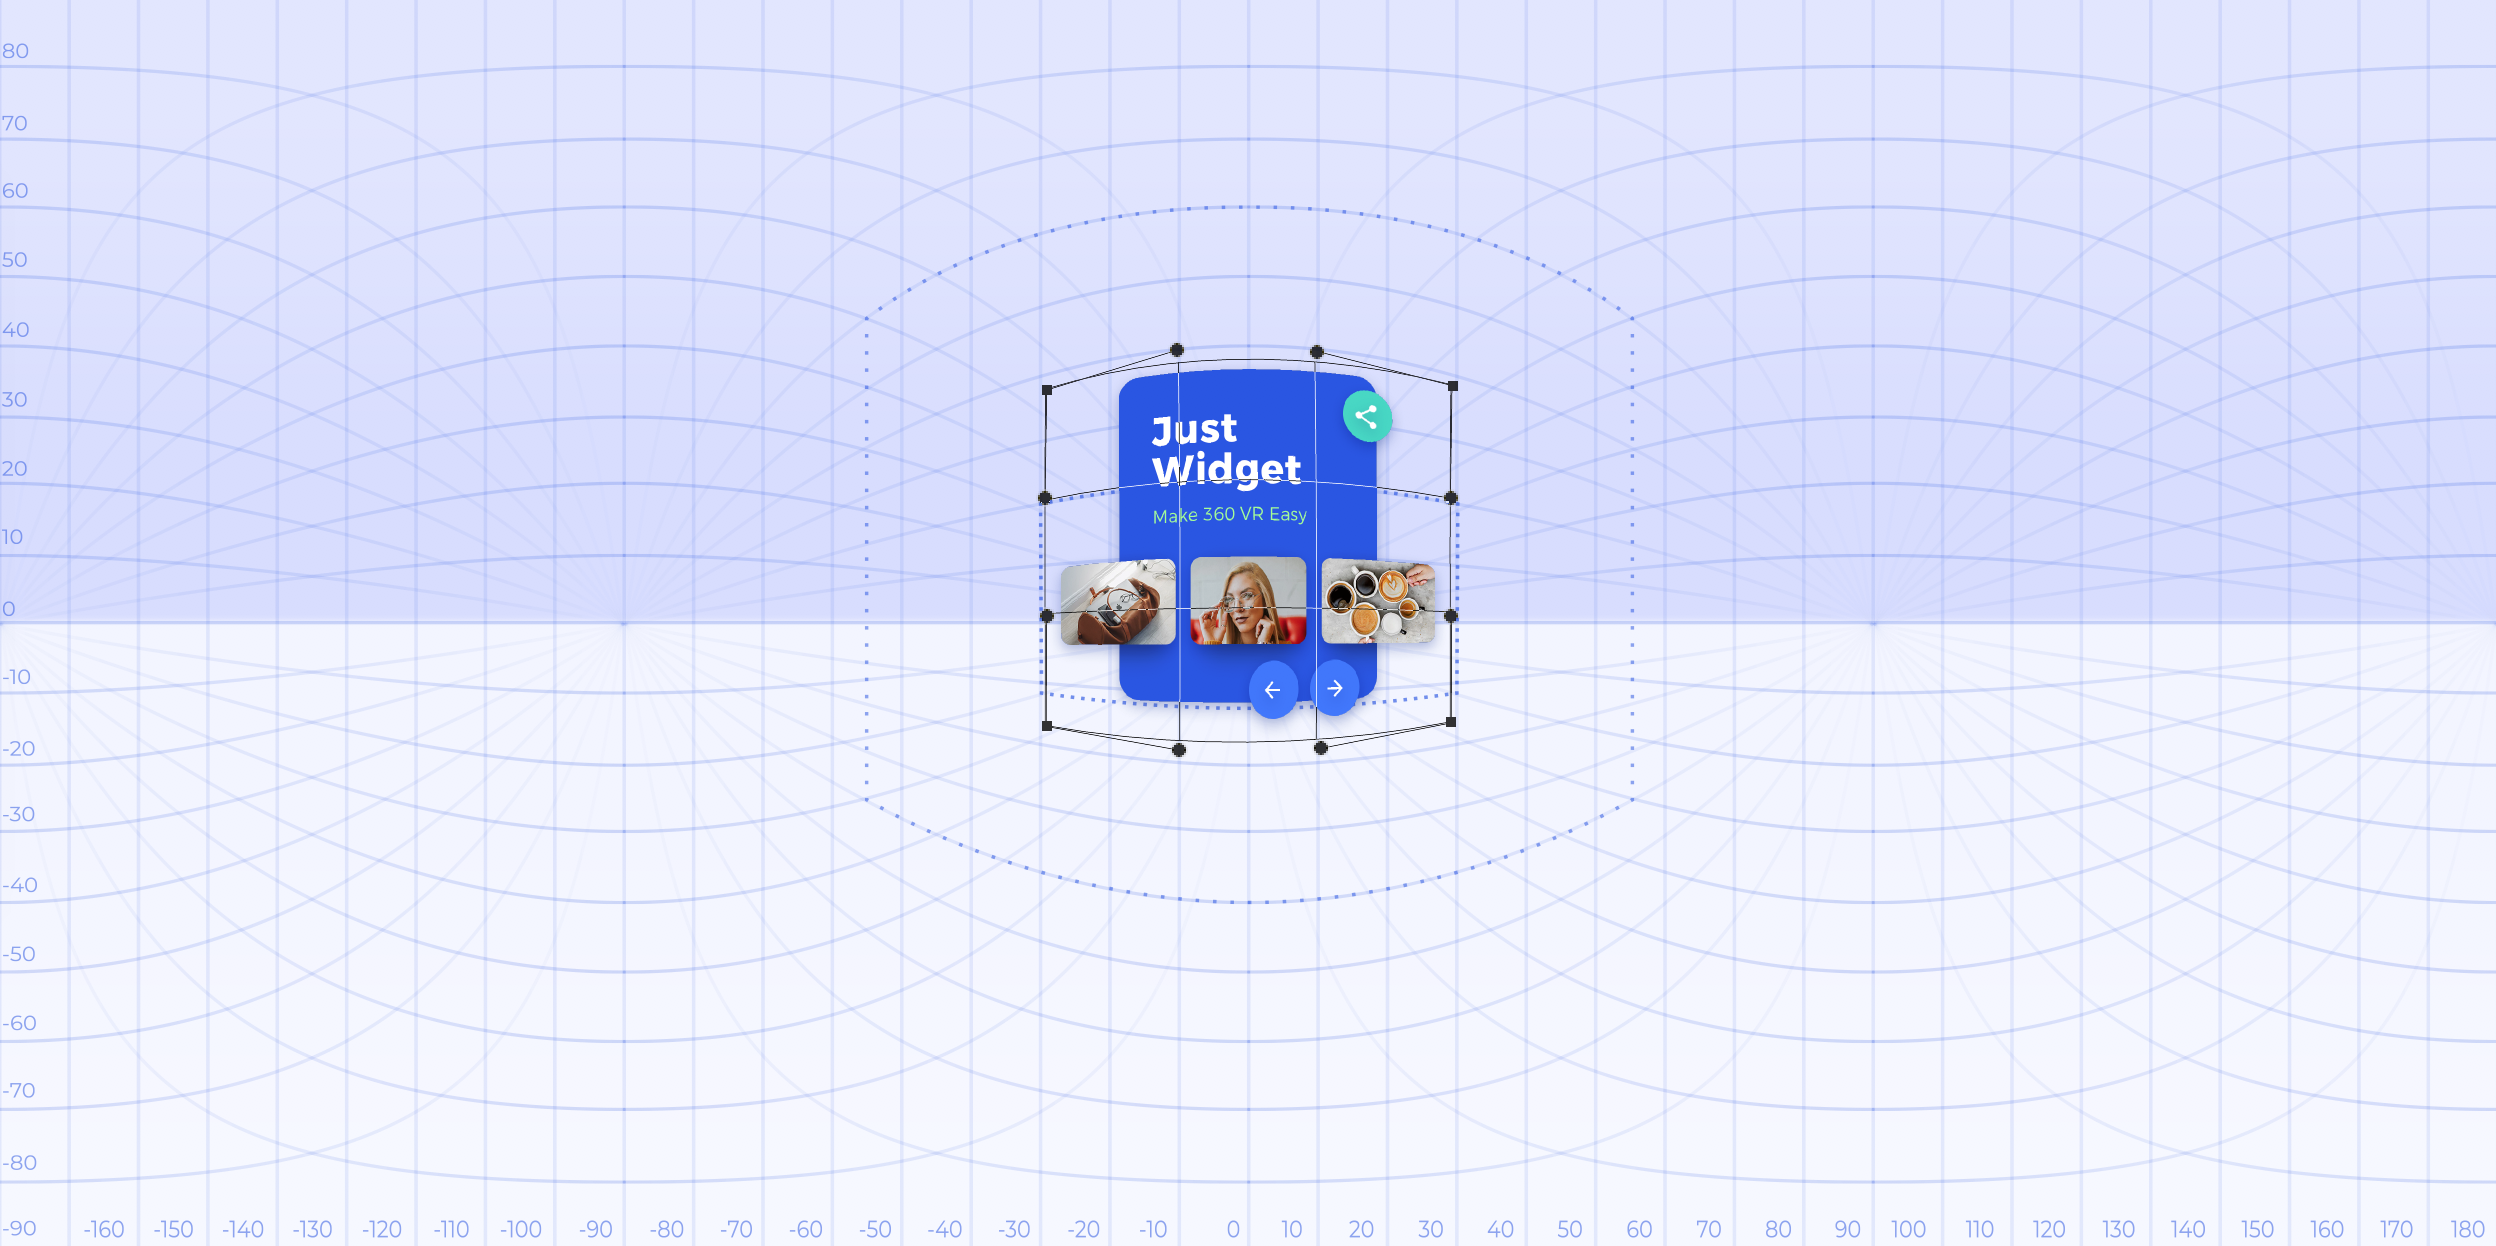
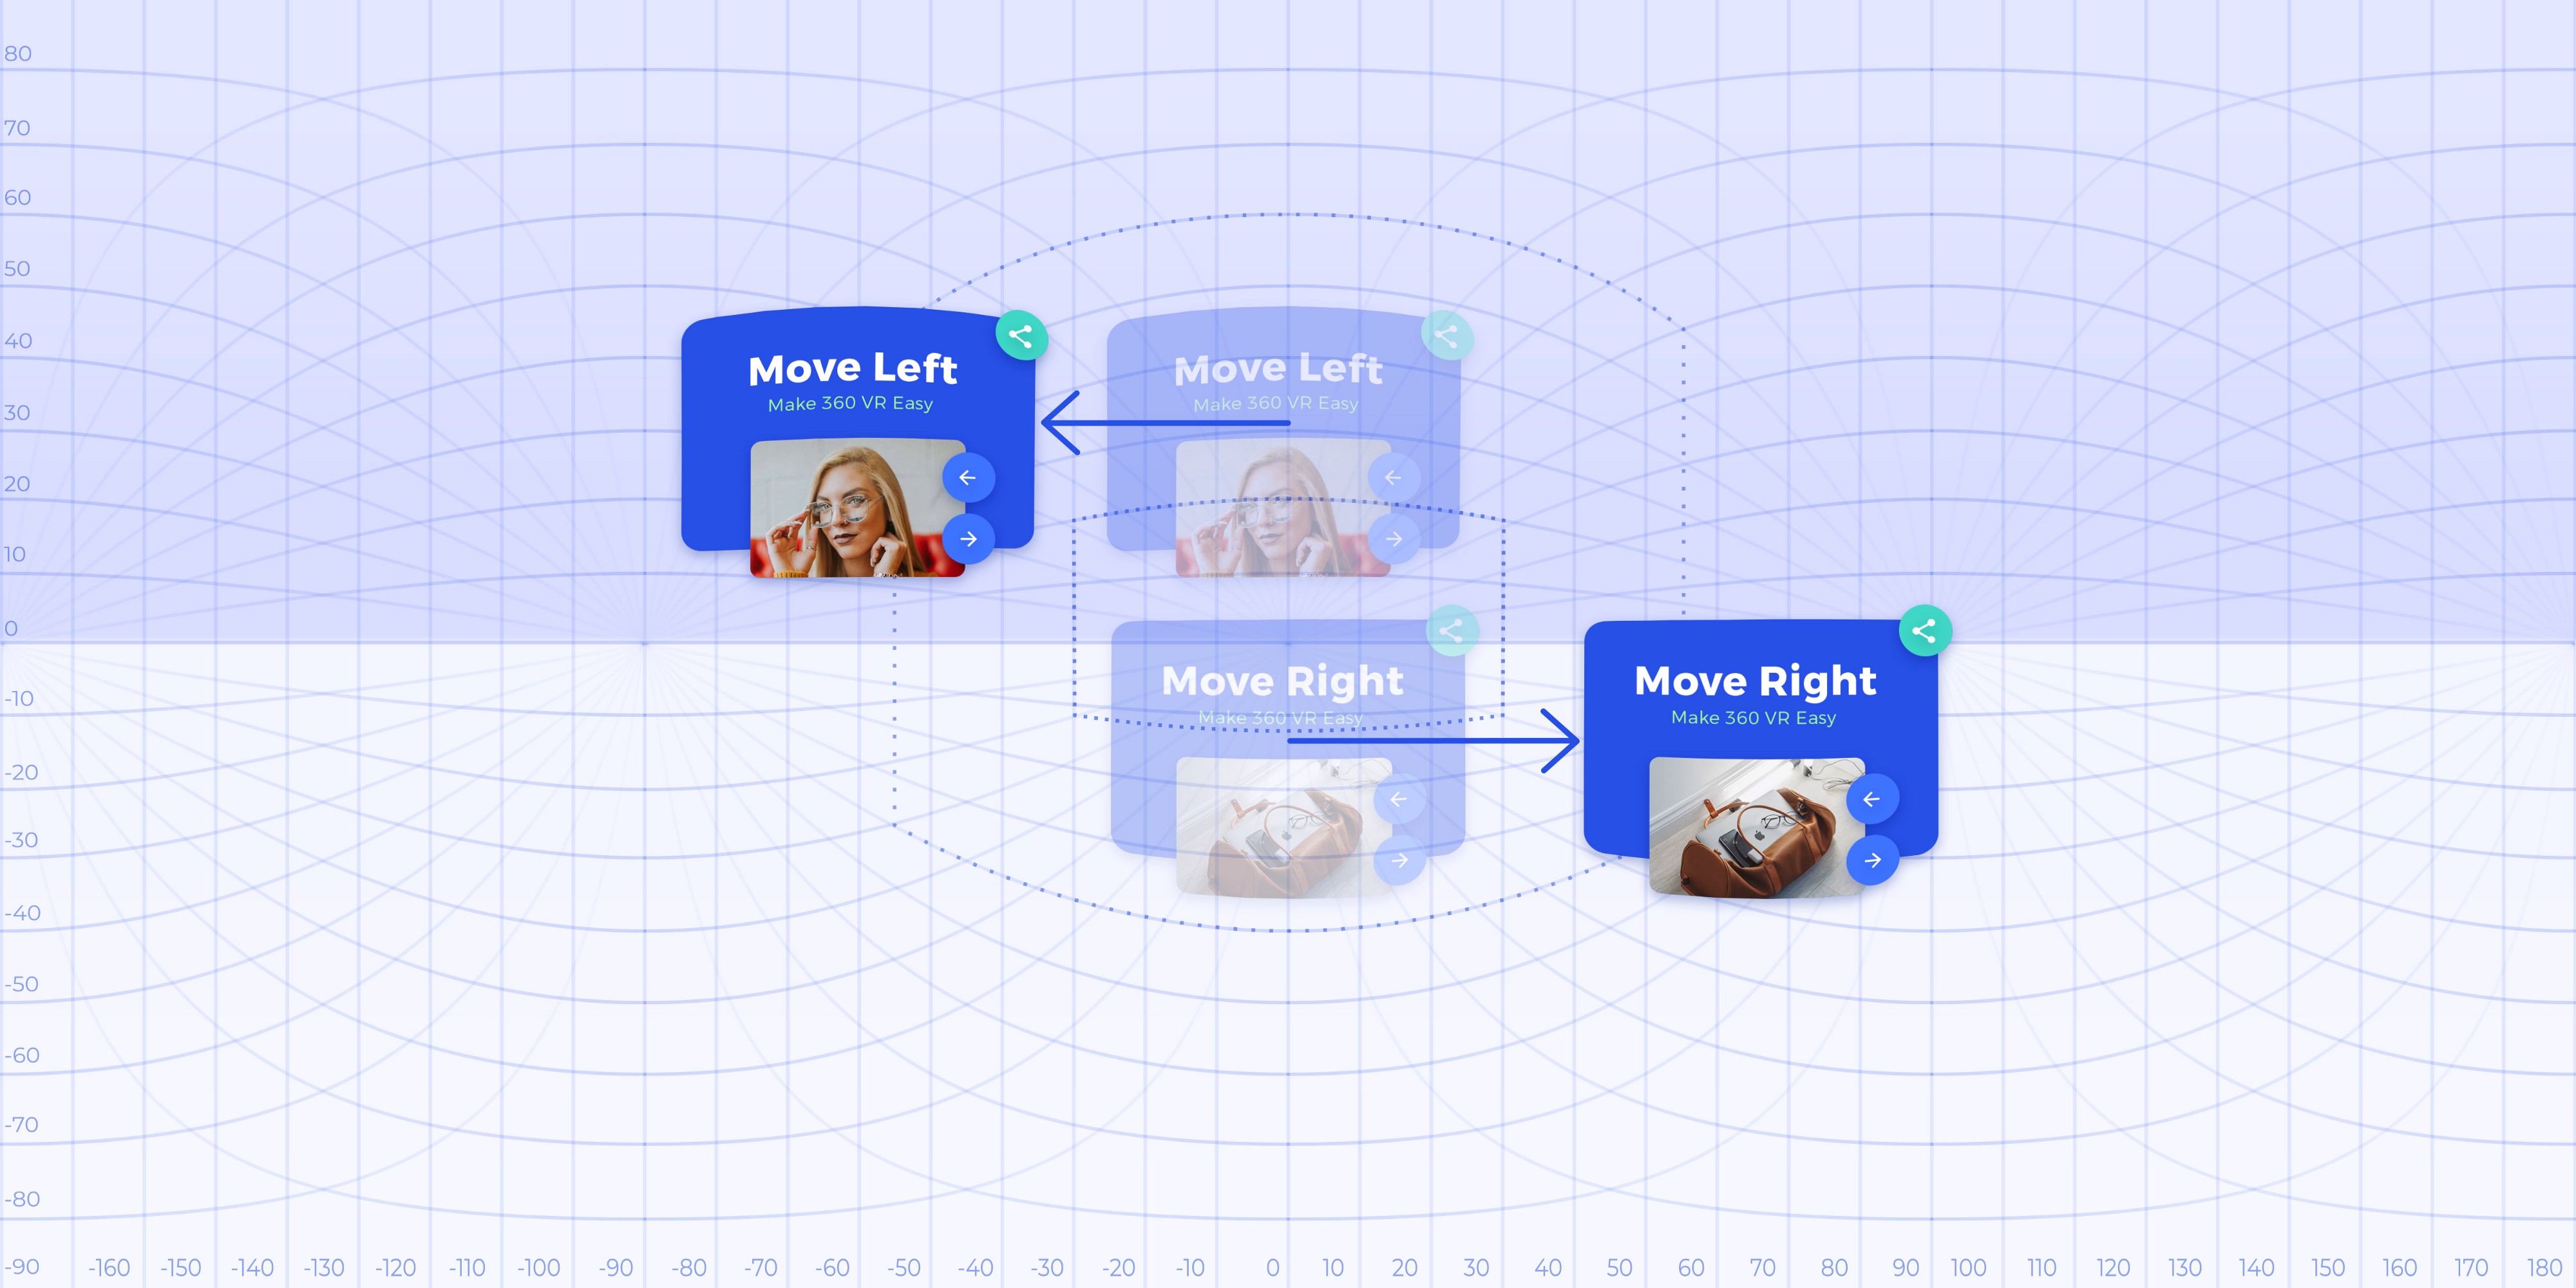
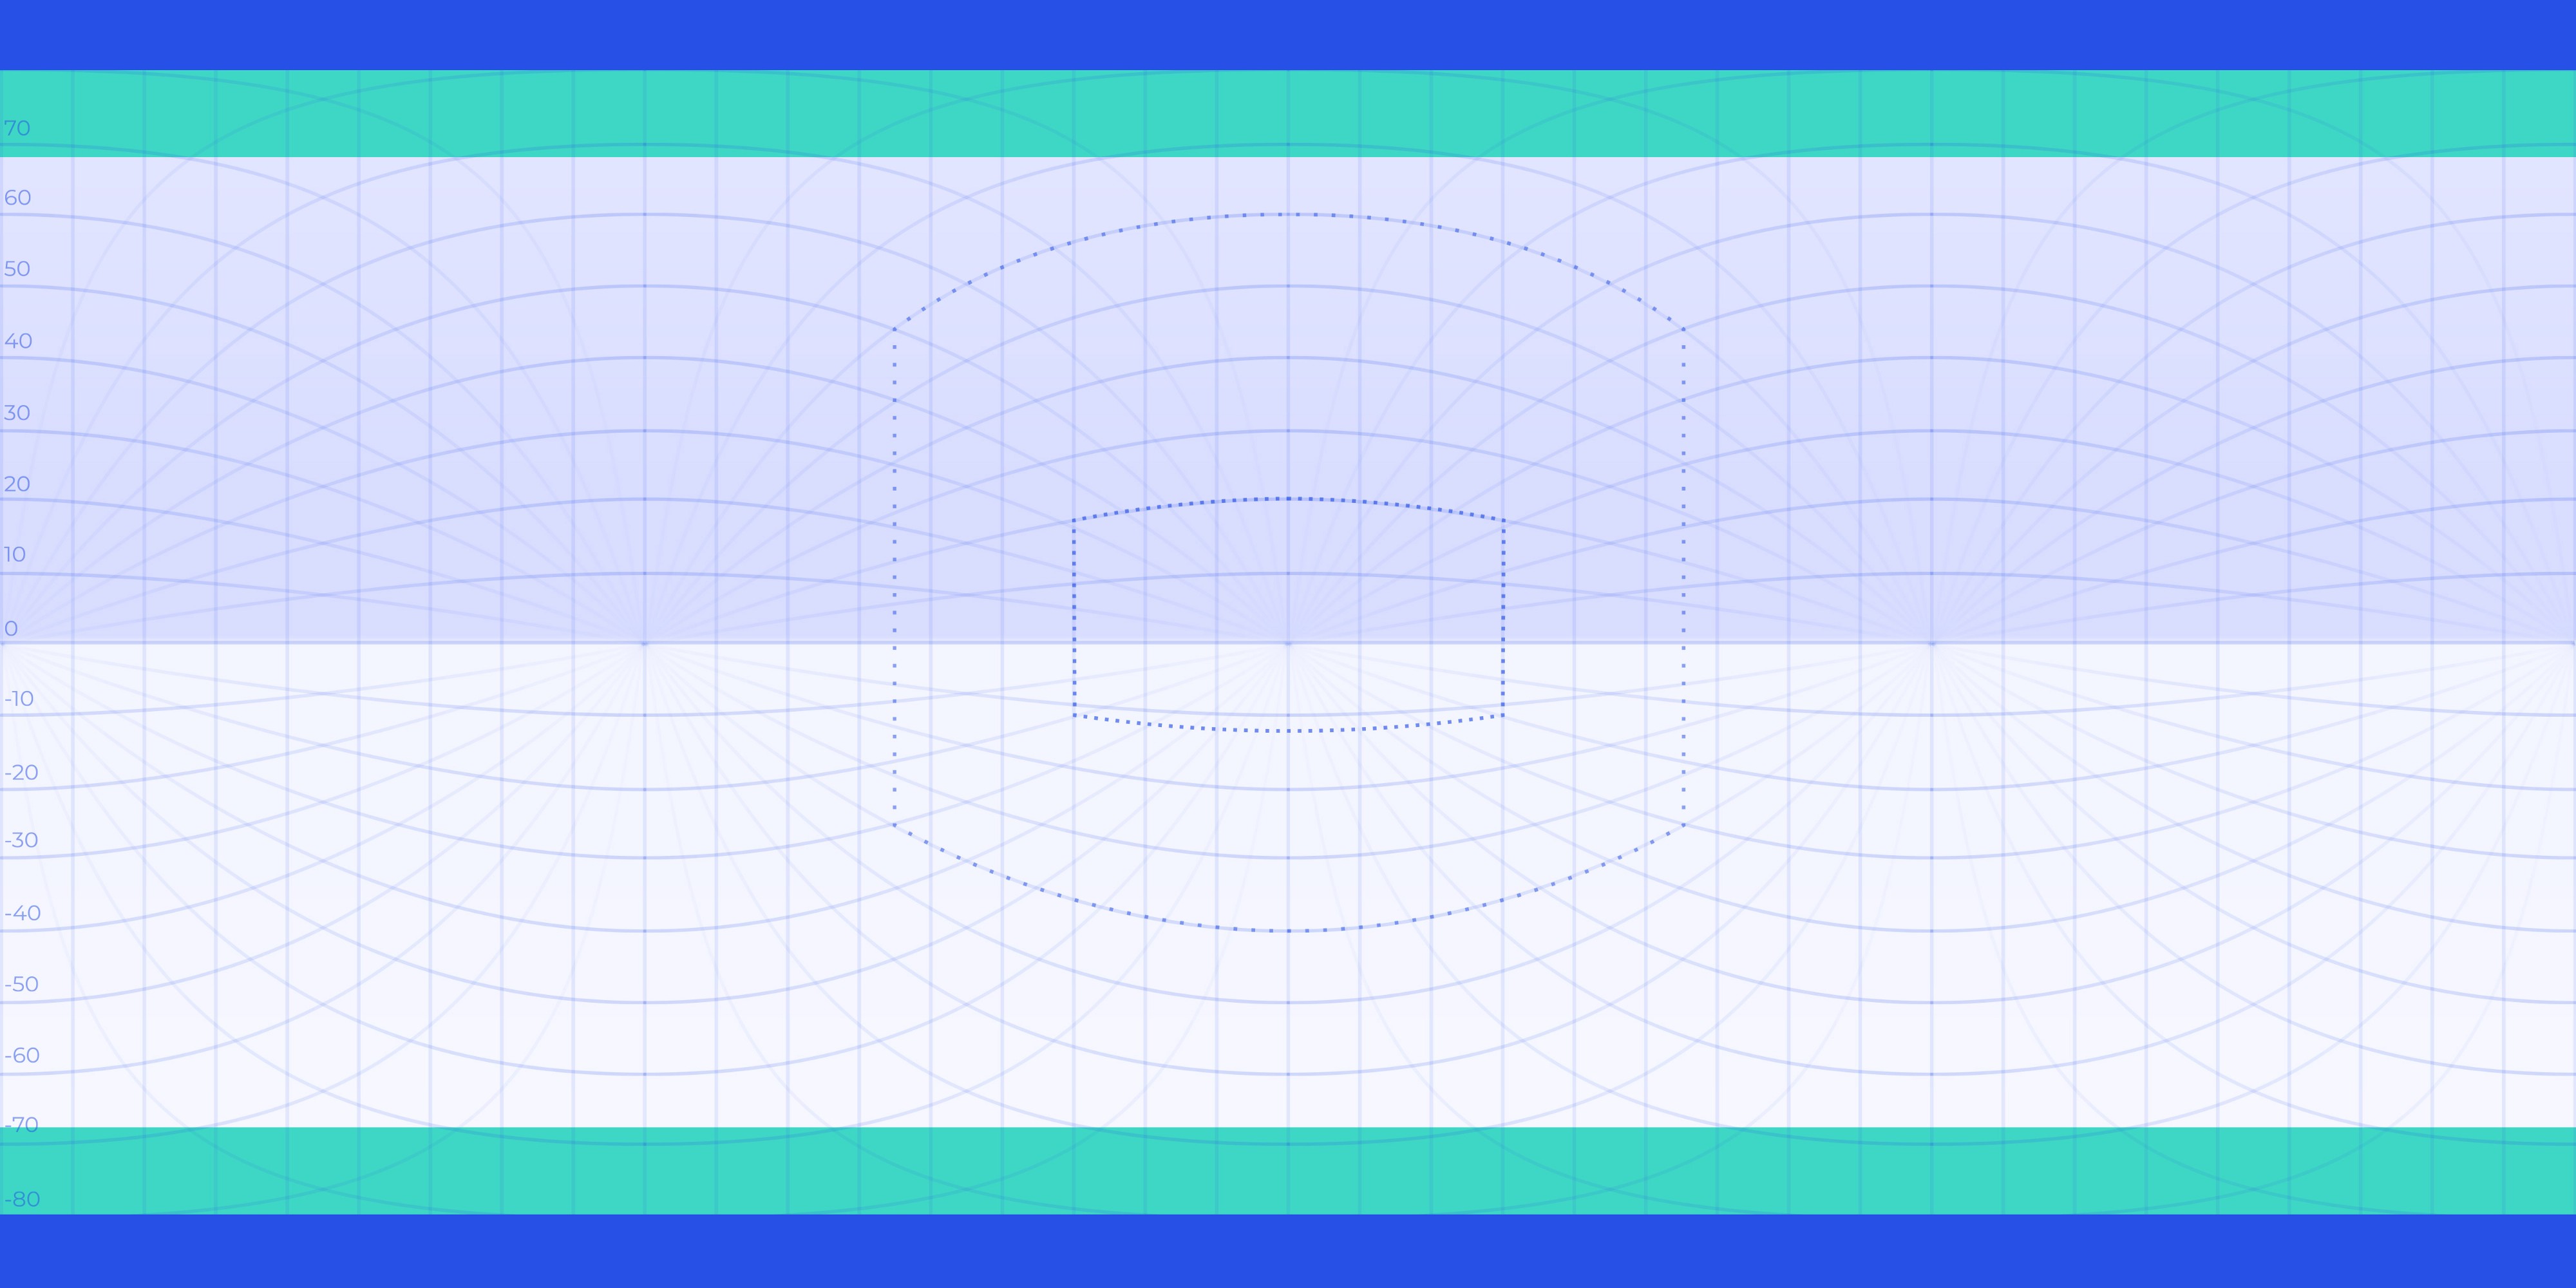
At first, start adding your designs on the artboard, for references use lines on the grid. The vertical grid shows the rotation of users point of view. In the centre is what a user will see in from of him.
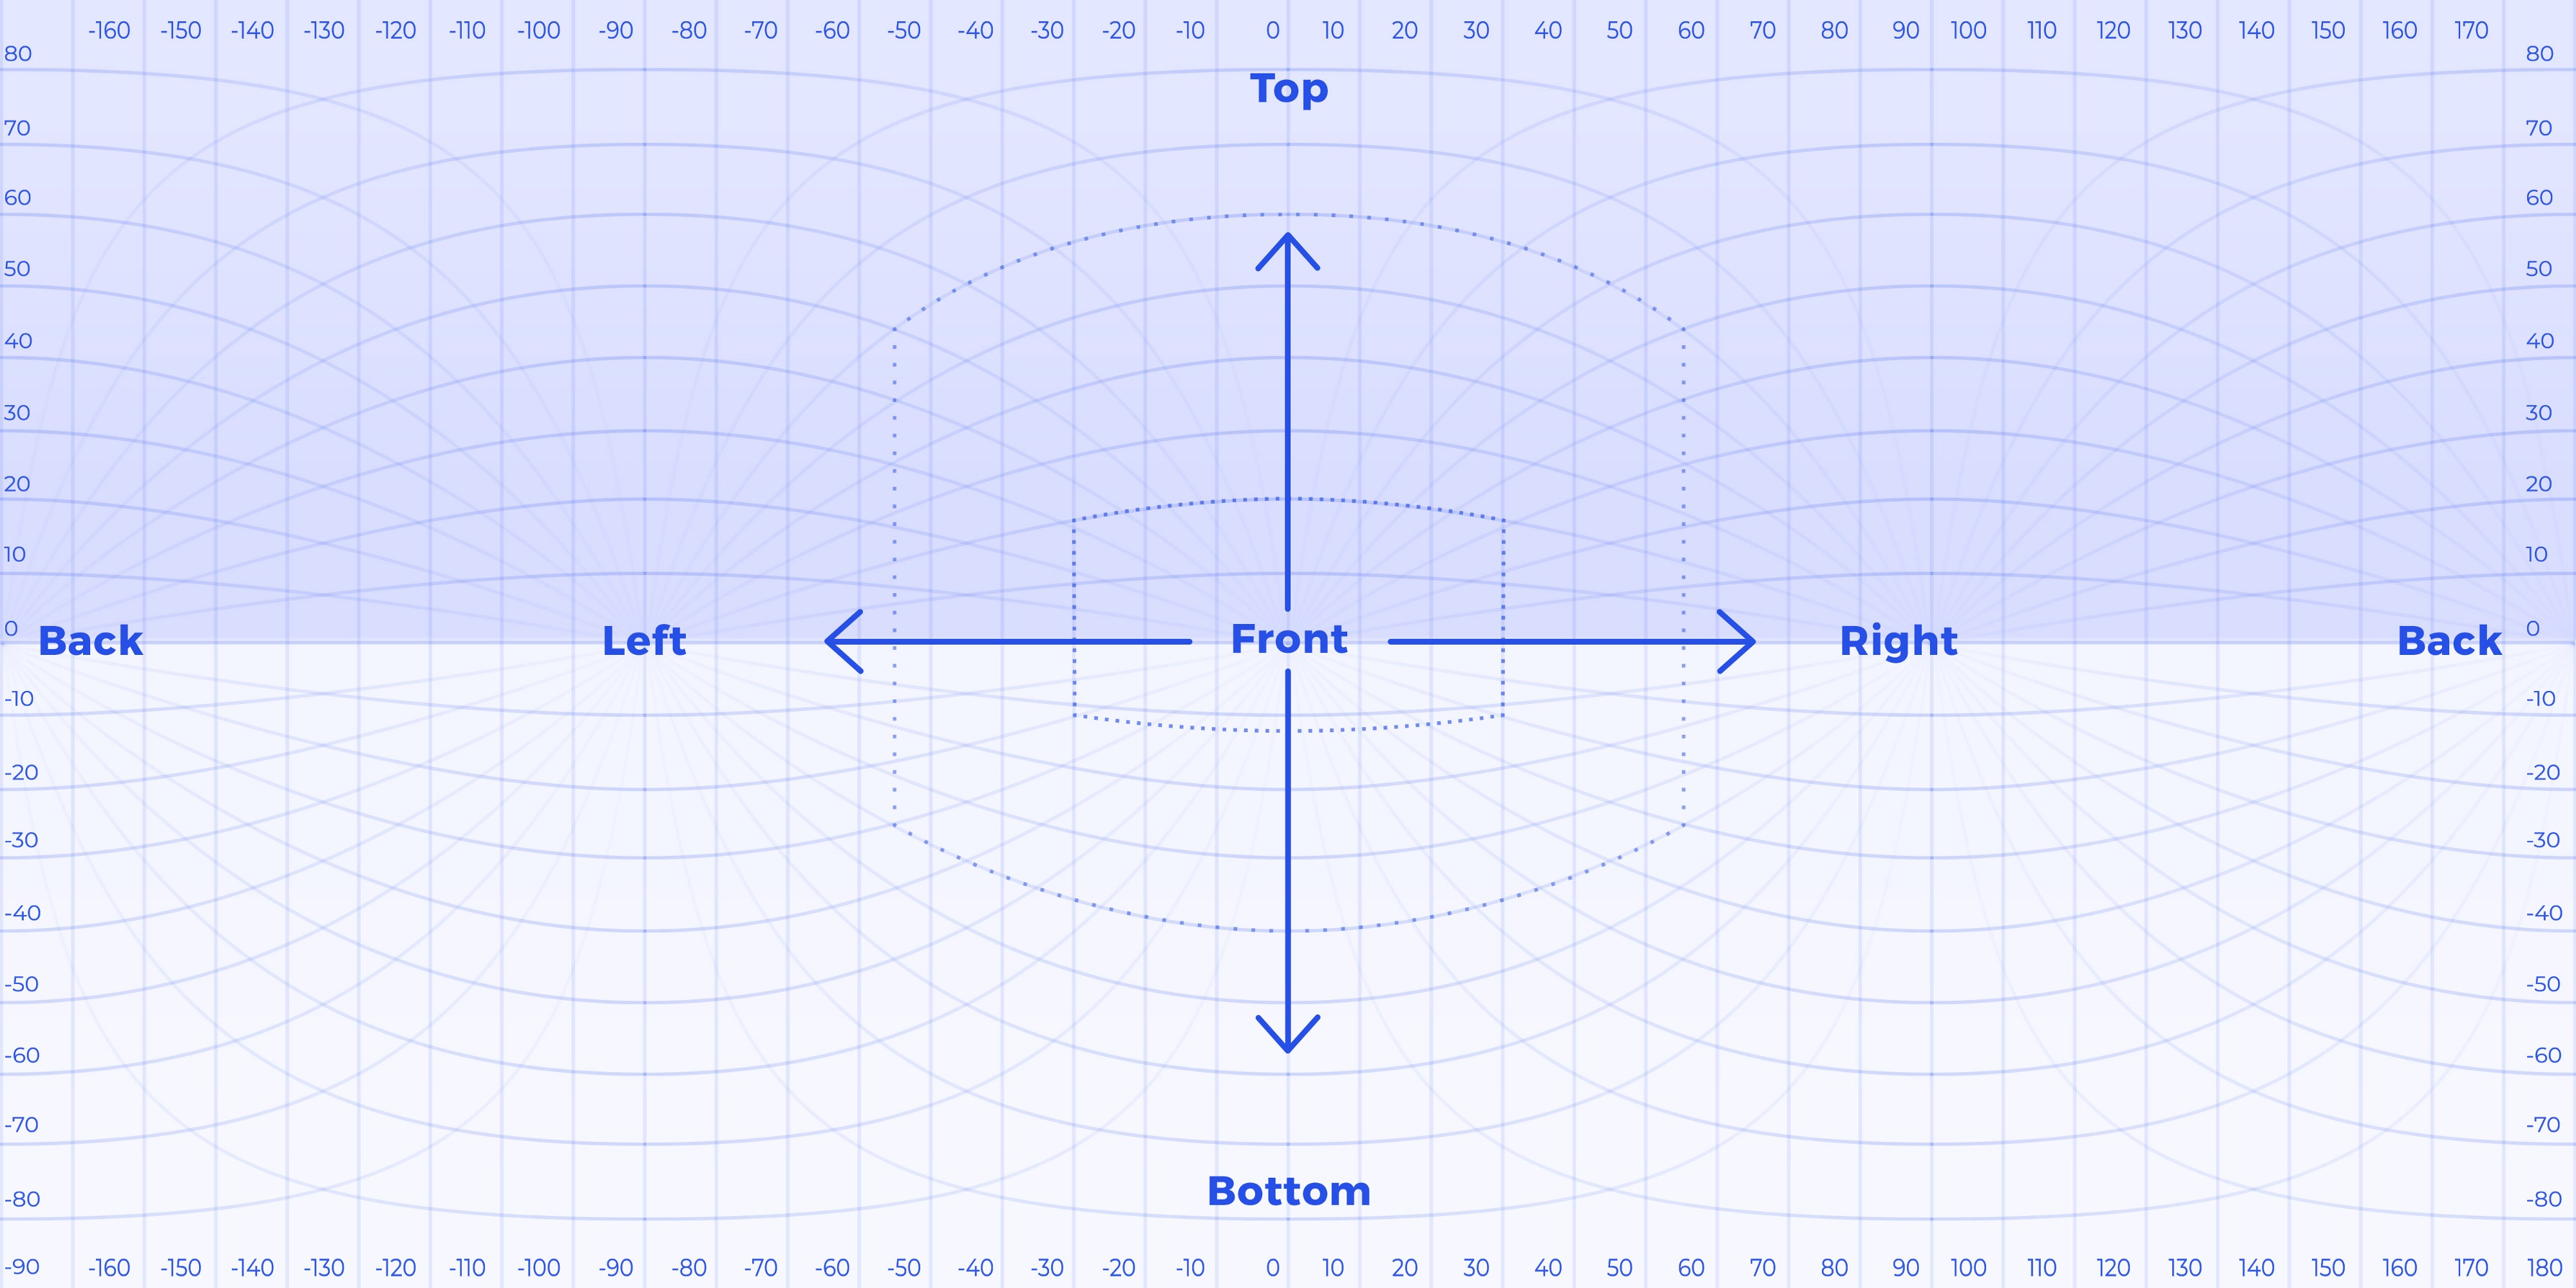
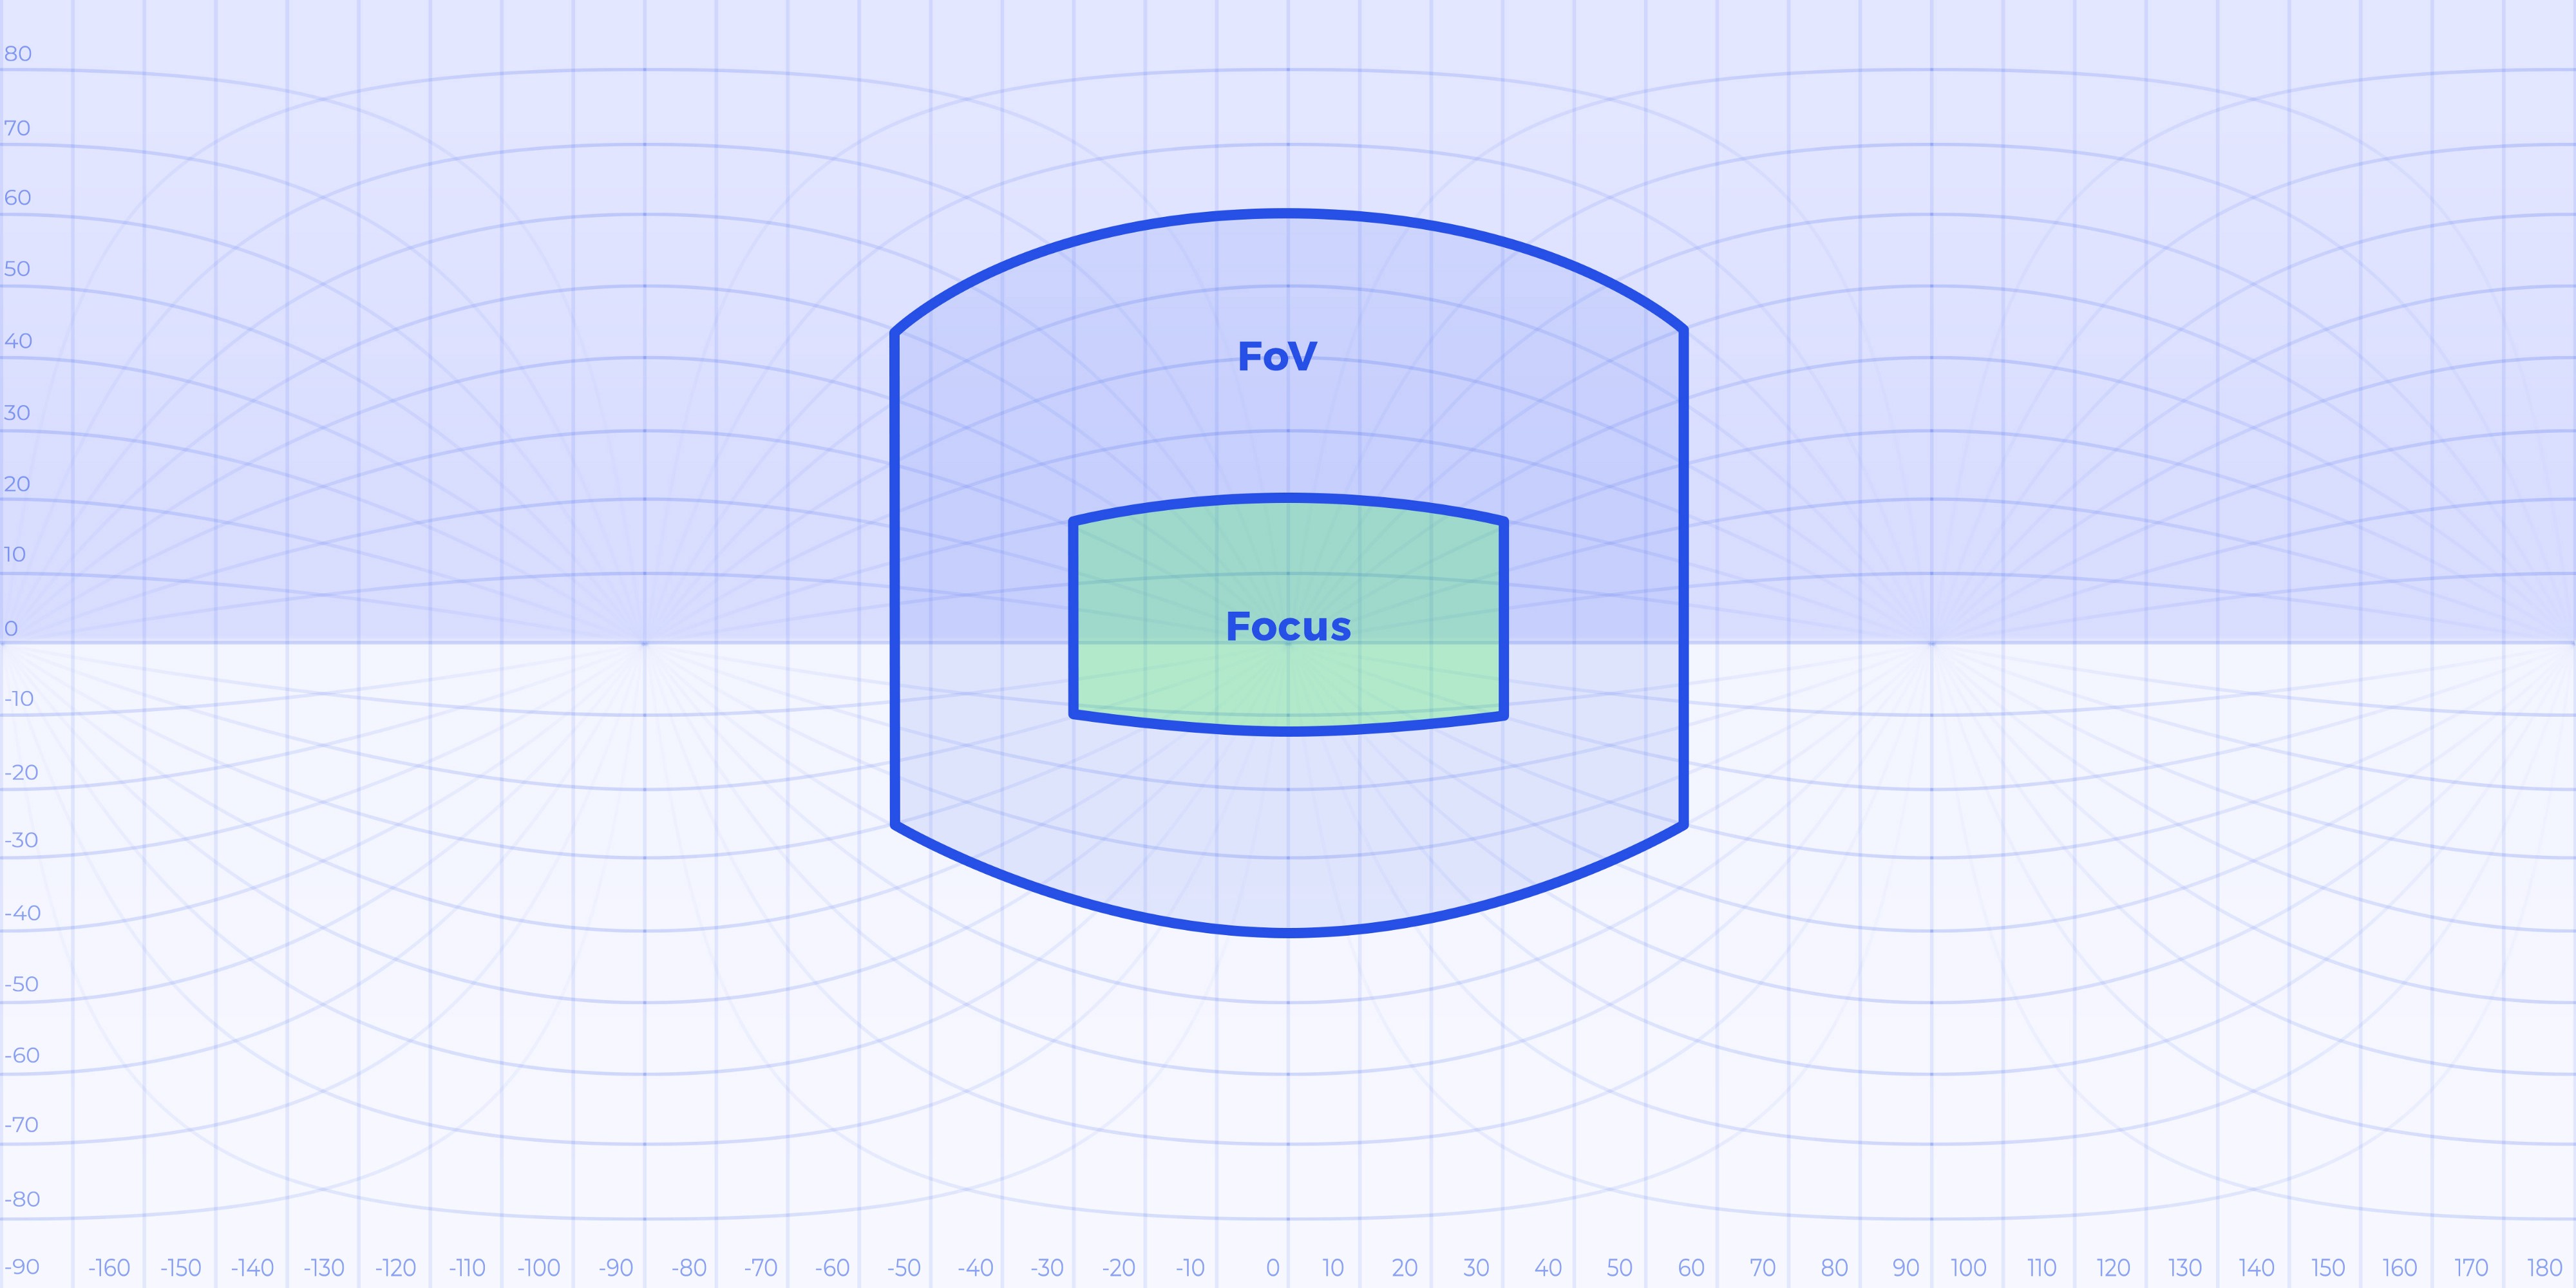
Also, there are two squares, that shows an approximate area of users focus (inside), and what is users full field of view (outside). They help to find scale and position elements in the right position.
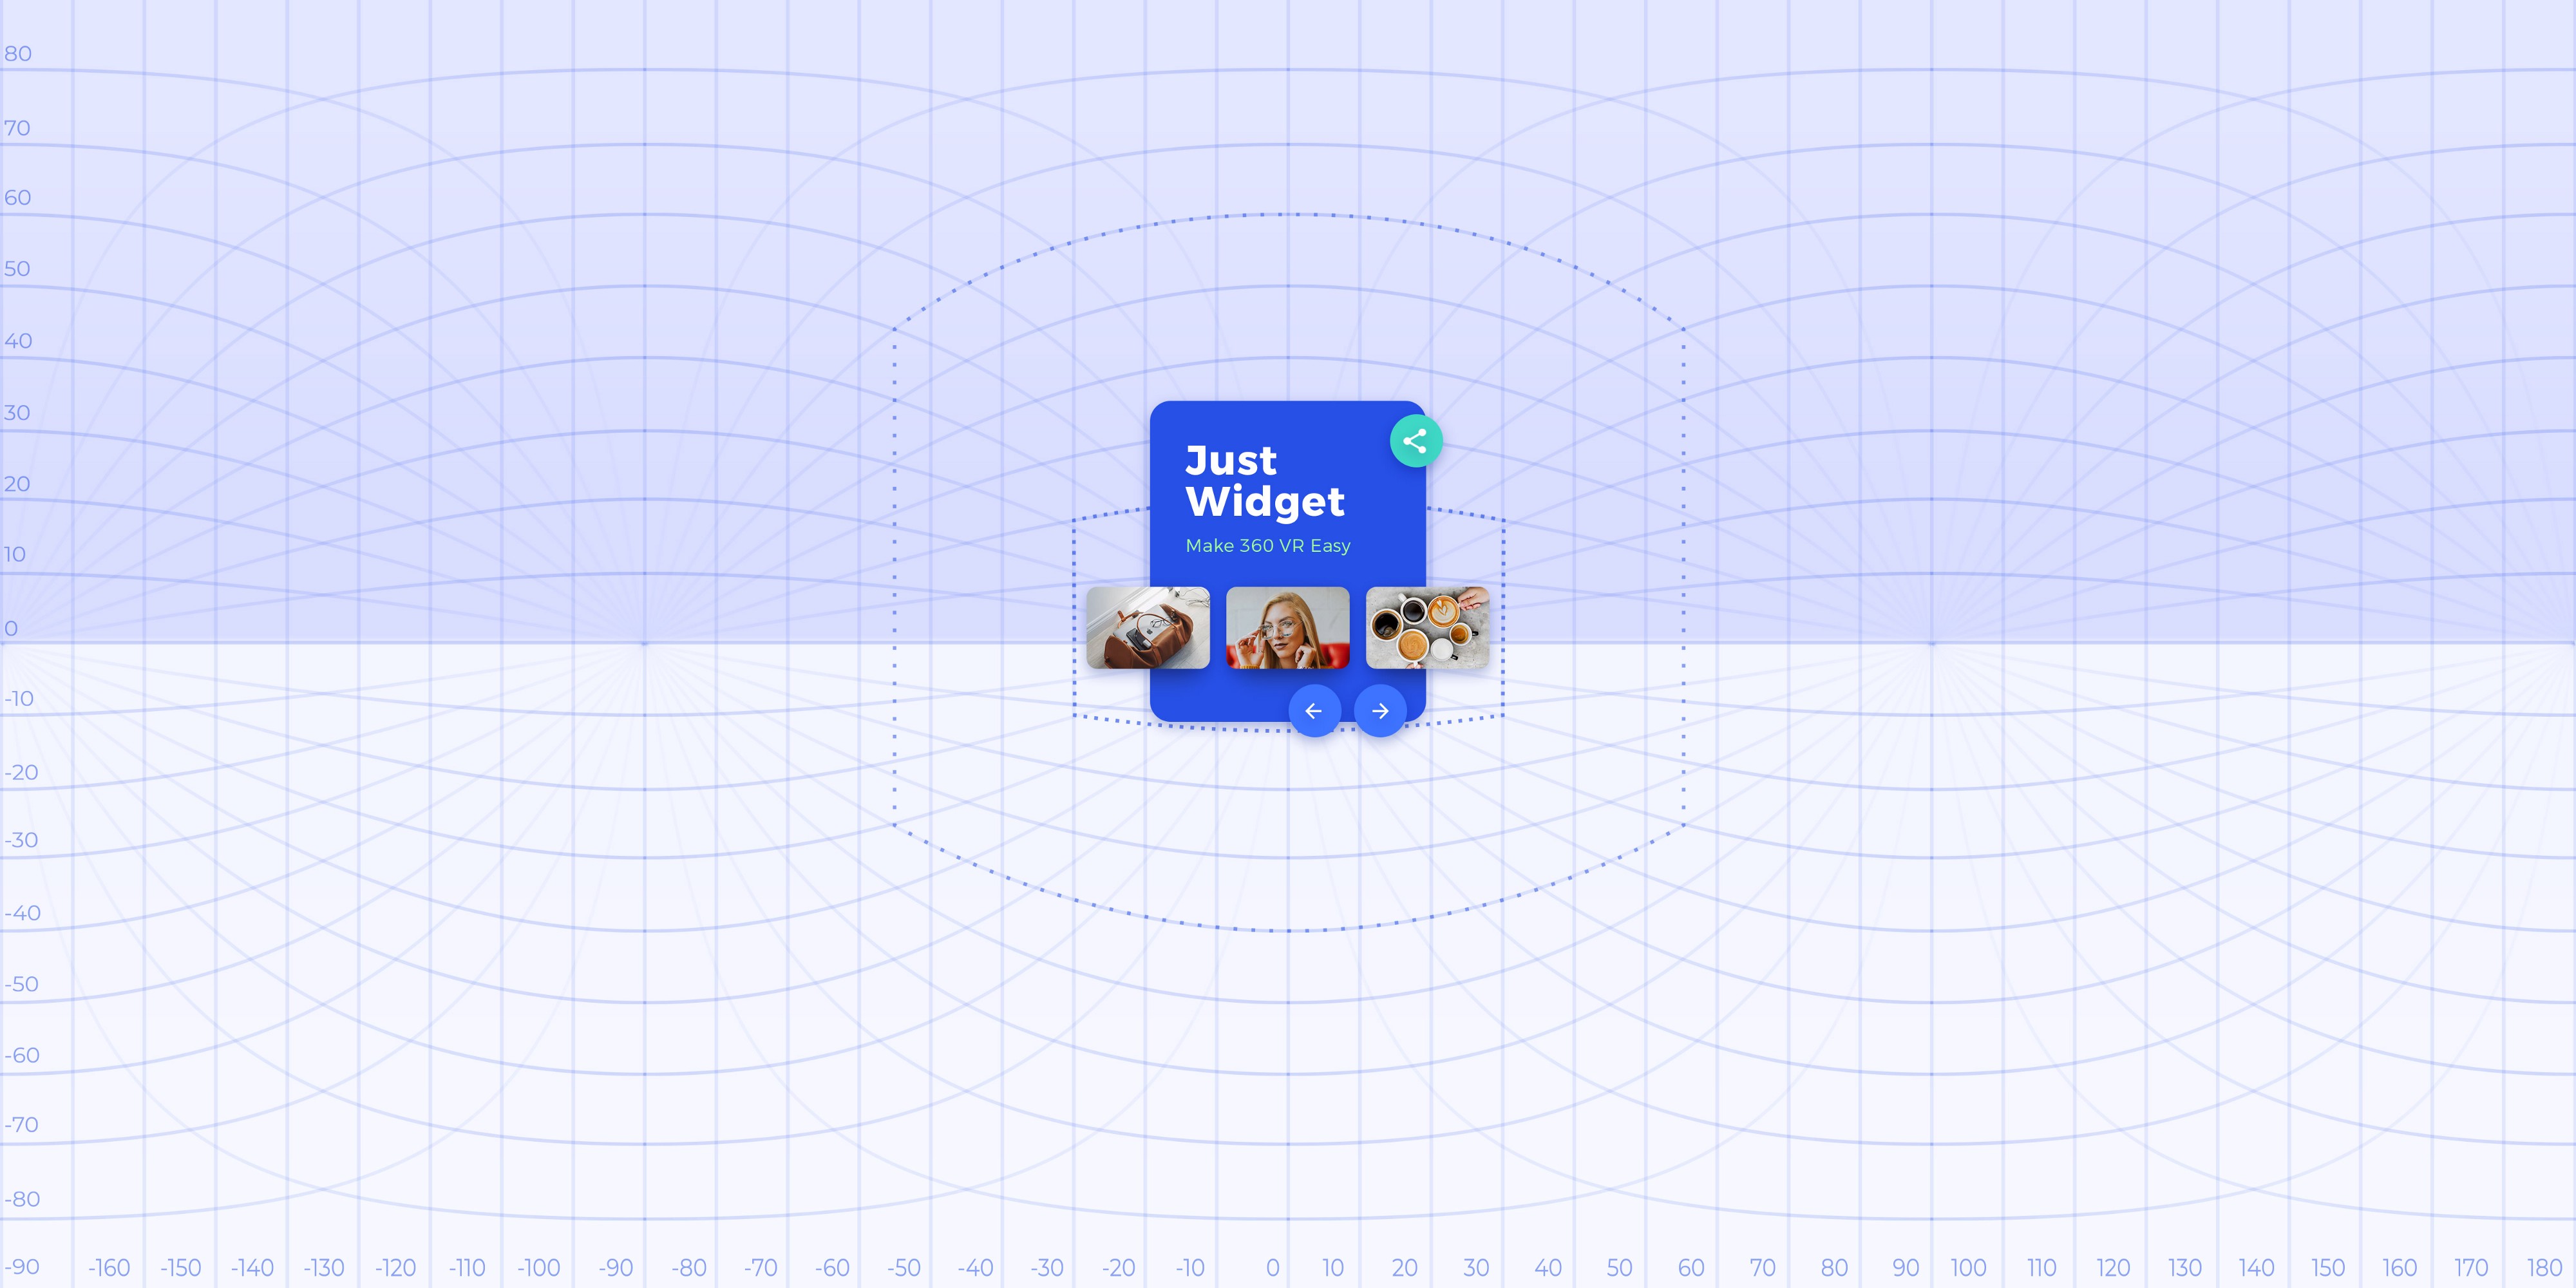
Let’s start by drawing a flat widget in the centre of the field of view. If you will keep it without transformation and open in VR, you will notice that the widget is curved.
For some cases it’s okay, but to get the flat surface, you should transform your widget in the opposite direction. To make it, convert all layers into a single, smart object, clickEdit -> Transform -> Warp, and make it curved in the opposite direction using lines as guides.
To draw a flat plane on side, you can do the same transformation using guides on the left and right from a user.
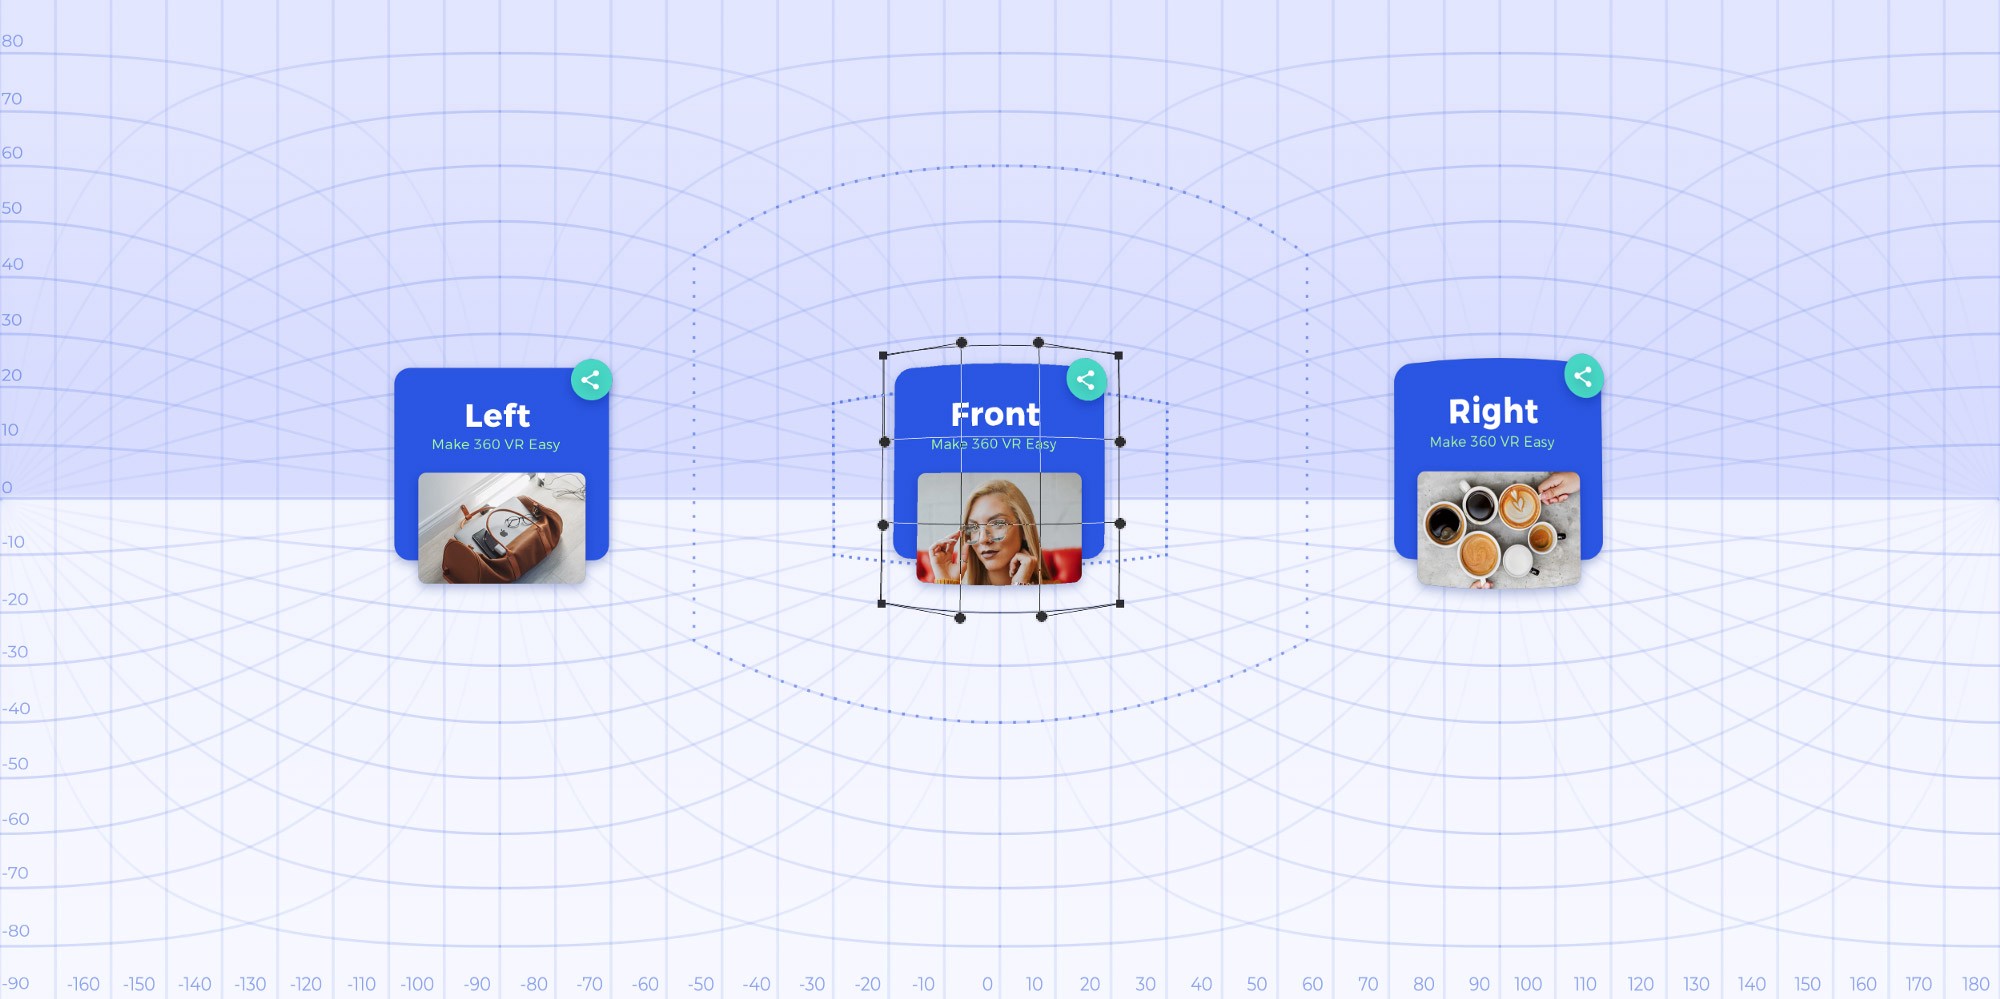
To get a flat widget in any other direction, use guides in the centre of view to transforming your smart object. And move it the right position later.
If you want to draw something on the top or the bottom from the user, you should transform it on the full width on the top or the bottom part of the grid.
The most important is to keep testing how it looks in VR. For every design, I had at least ten tests to get it just right.
Check out the video of my process:
What’s next?
Now you can share your design on platforms that support 360, like Facebook and YouTube. It’ll allow community to see your creativity.
There are more ways to open your image. For quick tests, I’m using GoPro VR player.
To get such gif, I use GoPro VR Player to open 360 picture, and just record my screen using Quick Time Player.
I hope that this short workflow will help you to design better VR experiences. You can download PSD file on Gumroad:
You can also use any other tool for design. I prefer to use Photoshop because it gives more flexibility in effects and transformations.


